如何给博客添加自定义 Live2D 看板娘
前言
平时在浏览许多前辈们的博客时,总能看到有不少前辈们的站点角落有引人注目的看板娘。我就在想,「如果自己的博客也能有自己喜欢的角色来彰显个性就好了」。
相信许多朋友们都和我一样,也想给自己的博客加上喜欢的角色作为看板娘吧?
众所周知,许多带看板娘的博客,其看板娘基本都用的是 Live2D 模型和引擎。Live2D 引擎使用 2.5D 设计和建模,其最大的特色是只要对角色各部位进行设计和建模,导出模型在查看器或 Live2D 引擎就能让角色动起来,无需花费大量时间画每一帧[1]。
为此,我们需要下载所需的 Live2D 引擎组件,进行添加 Live2D 看板娘,以及添加自定义 Live2D 看板娘角色(可选)。
所需条件
- 你的博客项目已建立好(修改前建议备份)
- 熟悉 Node.js、NPM、Yarn、PNPM、Git、VS Code 等运行时、包管理器、软件的使用,且已安装
- 丰富的认知和思考能力
- 足够的电脑性能
准备工作
其他主题或框架的部分方法可能有不同,具体请参考对应的文档说明。
下载和引入所需组件
下载 Live2D 依赖组件
进入 这个 Live2D 依赖组件的 GitHub 仓库 找到该依赖。
在页面选择【Code】—【Download ZIP】进行下载。
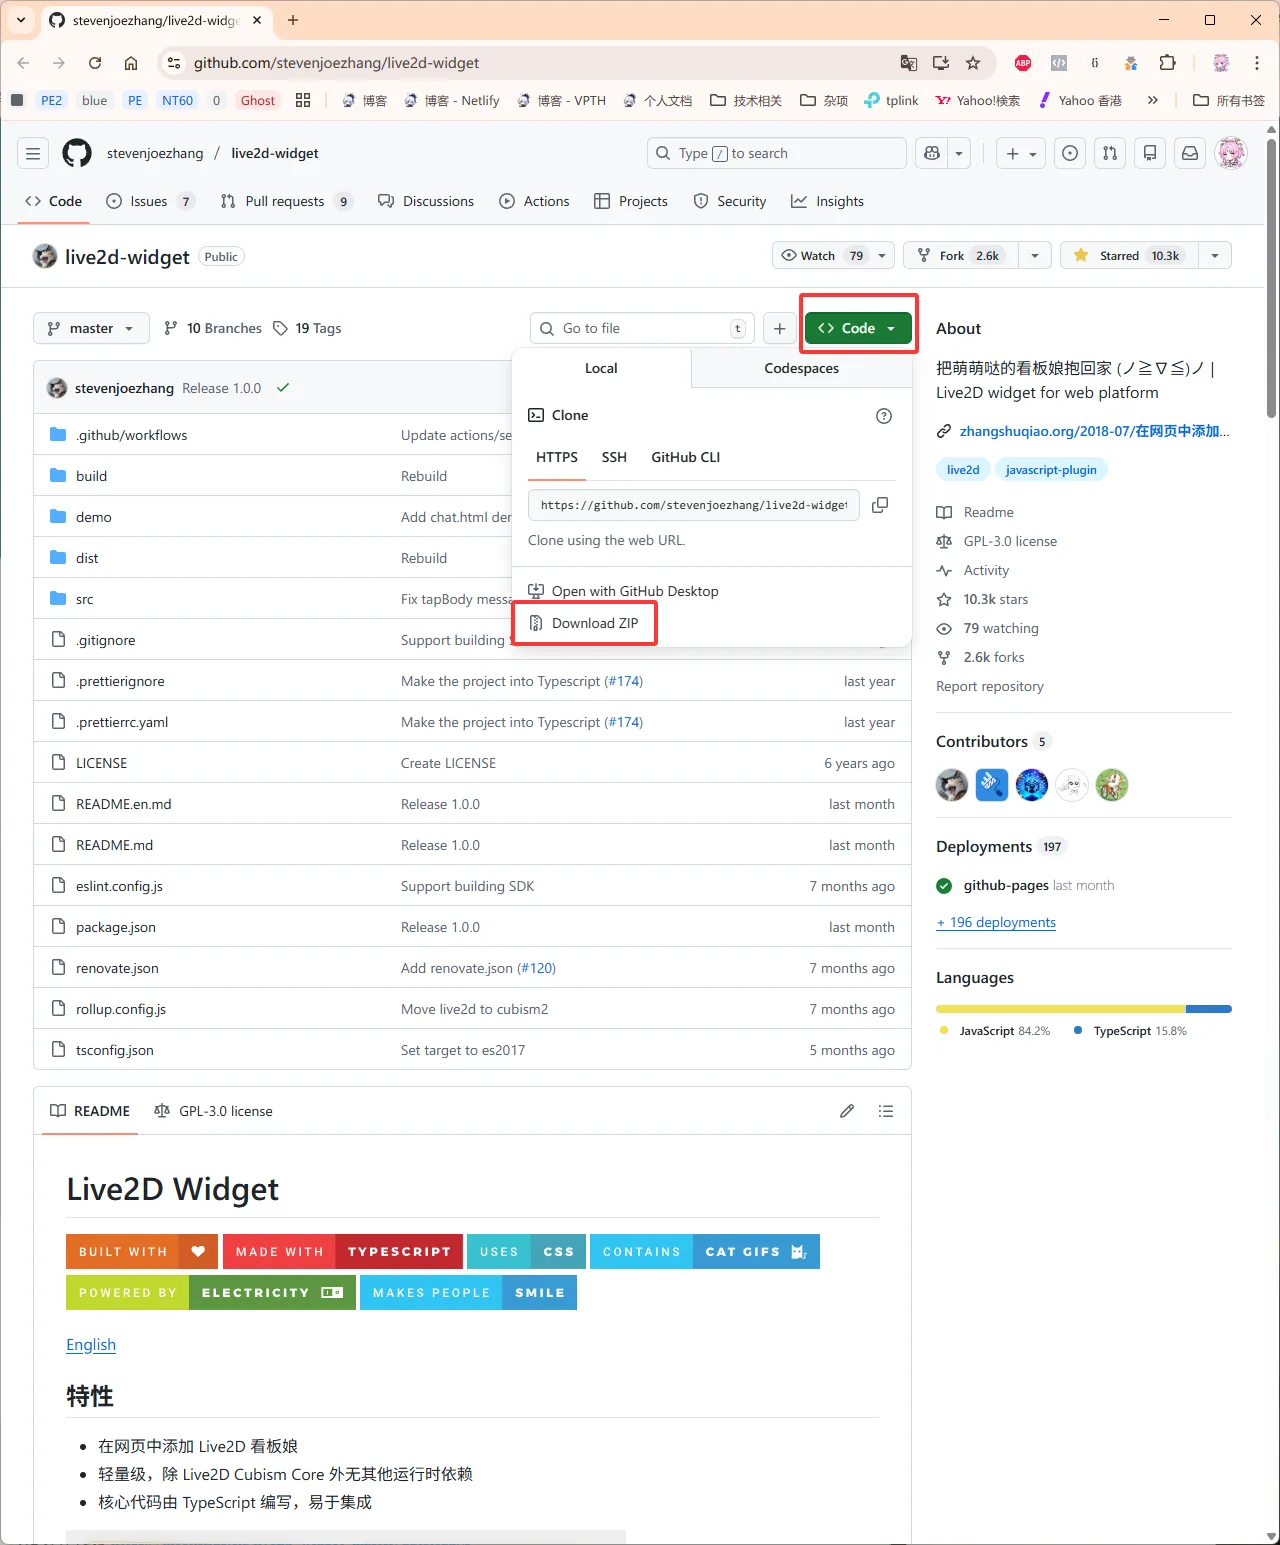
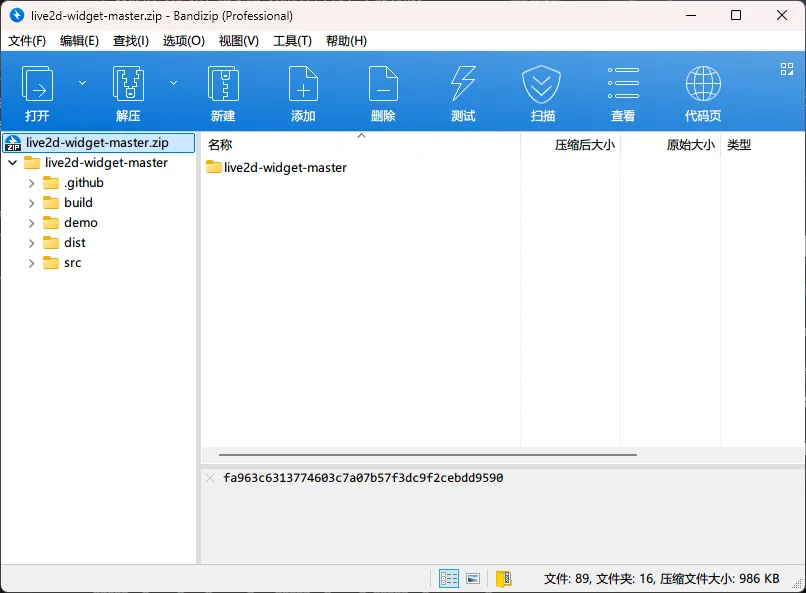
将依赖解压到 你的工作目录\source\live2d-widget 目录,如果 source 下没有 live2d-widget 目录,解压时会自动创建。
你也可以在 Git Bash 或其他终端使用 git clone 命令来下载到本地。
1 | git clone https://github.com/stevenjoezhang/live2d-widget |
引入 Live2D 依赖组件
在你的工作目录的根目录找到 _config.butterfly.yml 配置文件并打开。
推荐用 VS Code 打开你的工作目录,在左侧资源管理器中操作代码文件,使用更方便。
对于同为 Hexo 框架的其他主题,主题配置文件一样为 _config.theme.yml 格式。例如,NexT 主题为 _config.next.yml。
找到 inject 下的 bottom 字段,按照注释中的格式填入 autoload.js 所在路径。
1 | # Inject |
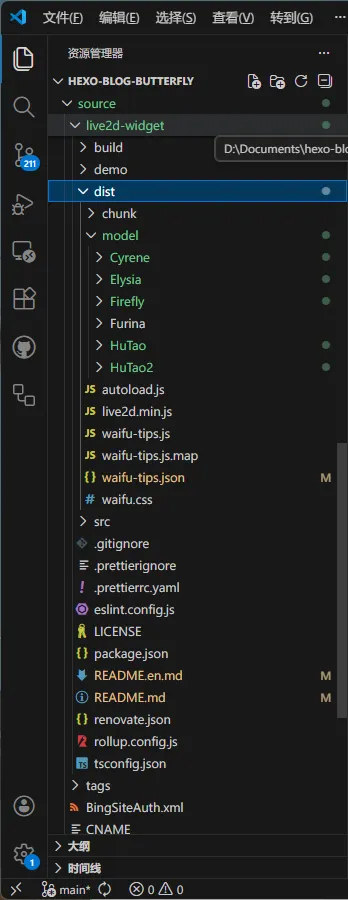
打开 source 里的 live2d-widget\autoload.js,修改 const live2d_path 字段参数为 /live2d-widget/dist/ 并保存。
1 | // Recommended to use absolute path for live2d_path parameter |
【可选】优化模型显示效果
打开 source 里的 live2d-widget\autoload.js。
由于手机屏幕尺寸有限,个人建议禁用手机端加载。将 if (screen.width < 768) return; 字段取消注释。
1 | // If you are concerned about display issues on mobile devices, you can use screen.width to determine whether to load |
更多说明,请参考 仓库 的 README.md 自述文件。
【可选】下载、解包、引入 Live2D 模型
使用模型前,请仔细阅读并务必遵守相应的注意事项。对于因不当使用而产生的纠纷,本人概不负责。
并非所有模型都能 100% 兼容。
下载 Live2D 模型
在各类站点下载你想要的 Live2D 模型。推荐几个 GitHub 仓库:
【如果需要】导出 Live2DViewerEX 创意工坊模型
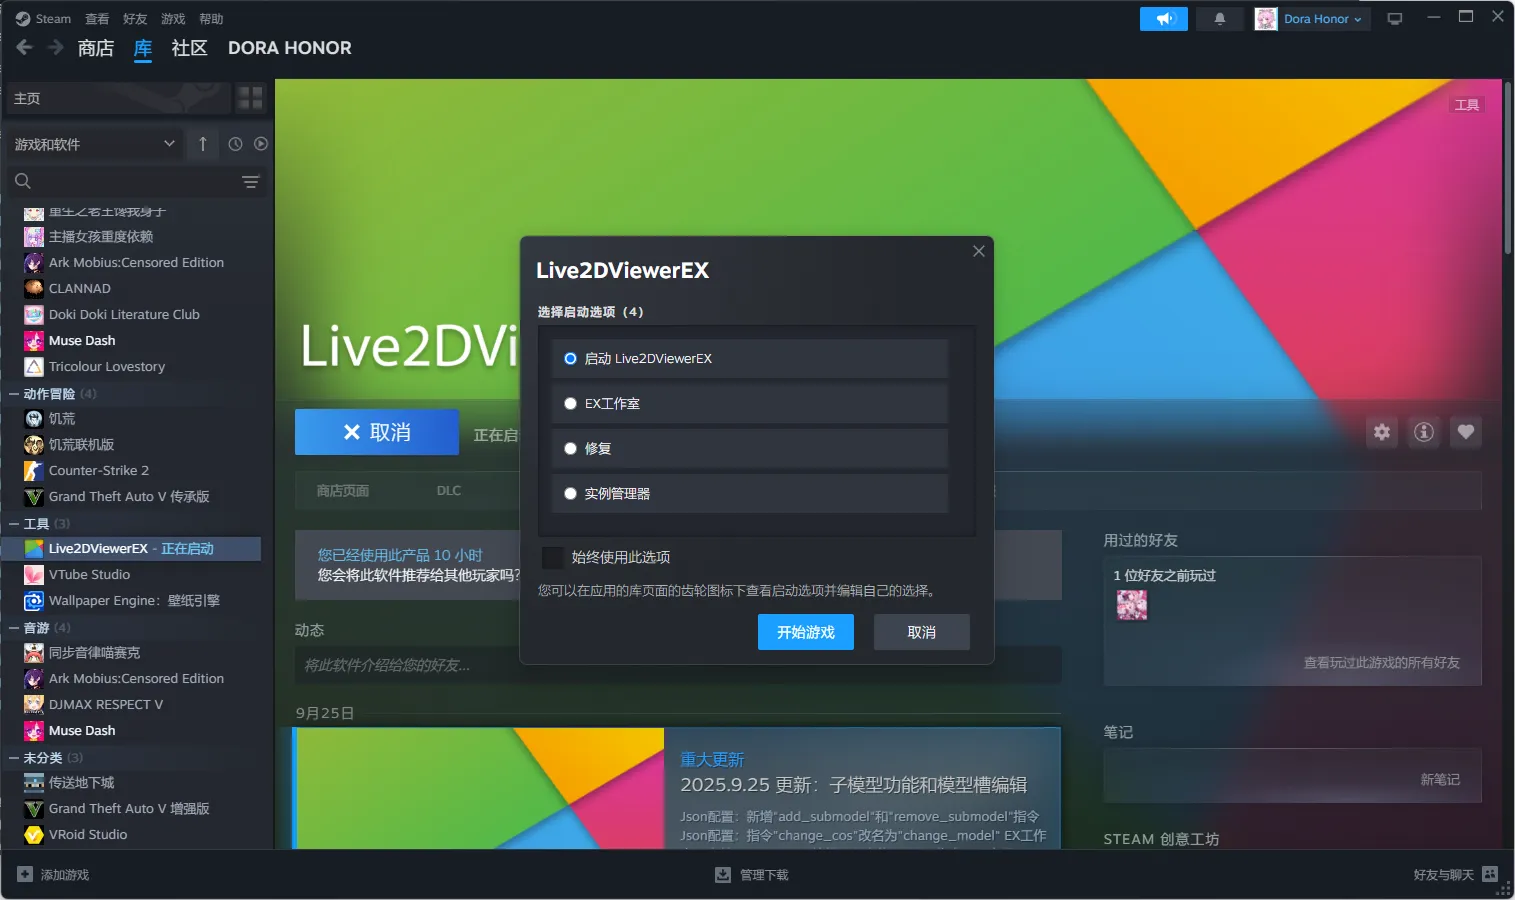
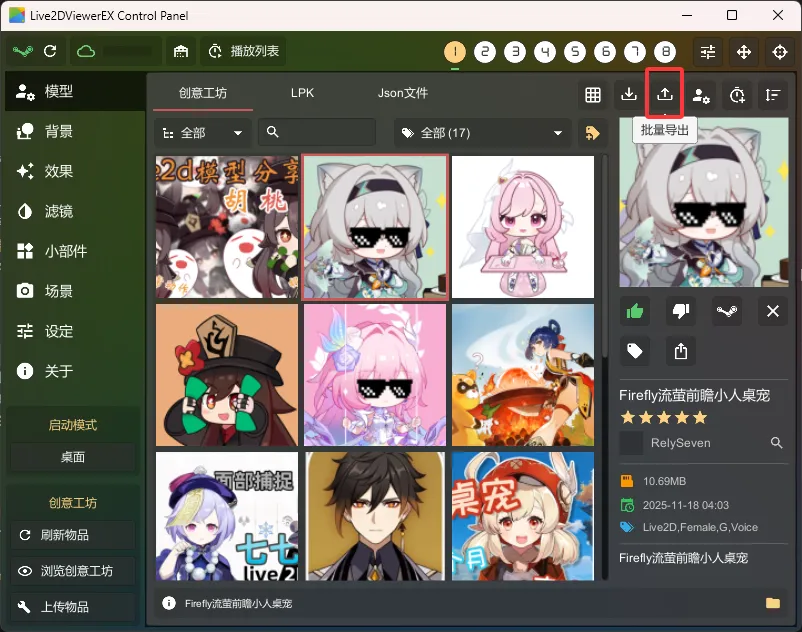
请确保 Steam 和 Live2DViewerEX 均已安装,并且 Steam 已经启动。
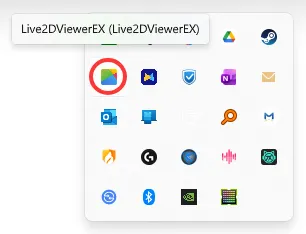
在 Steam 库找到 Live2DViewerEX,选择【启动】,在弹出的对话框中选择【启动 Live2DViewerEX】—【开始游戏】。
在任务栏找到 Live2DViewerEX 图标,双击打开界面,找到并单击右侧的【批量导出】按钮。
选择你所需导出的模型,完成后单击【确认】,找到所需导出的路径,单击【选择文件夹】。
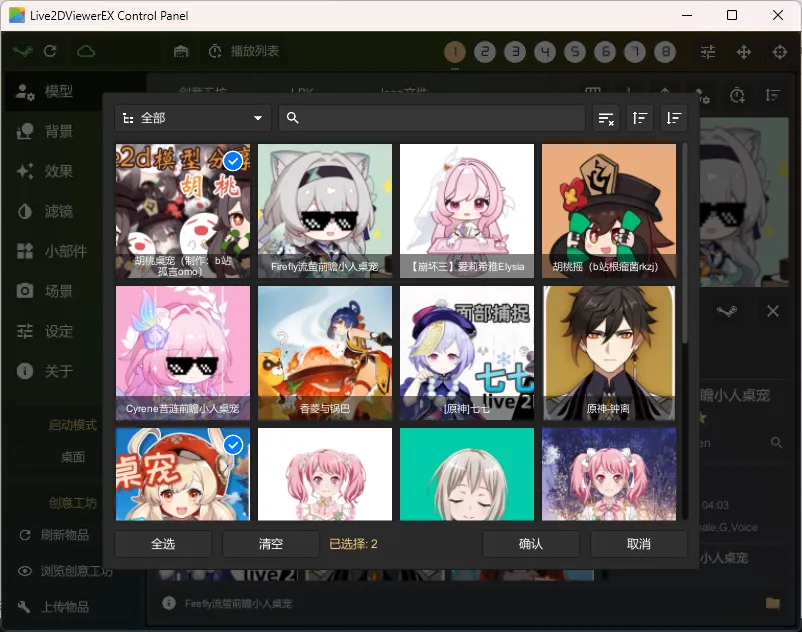
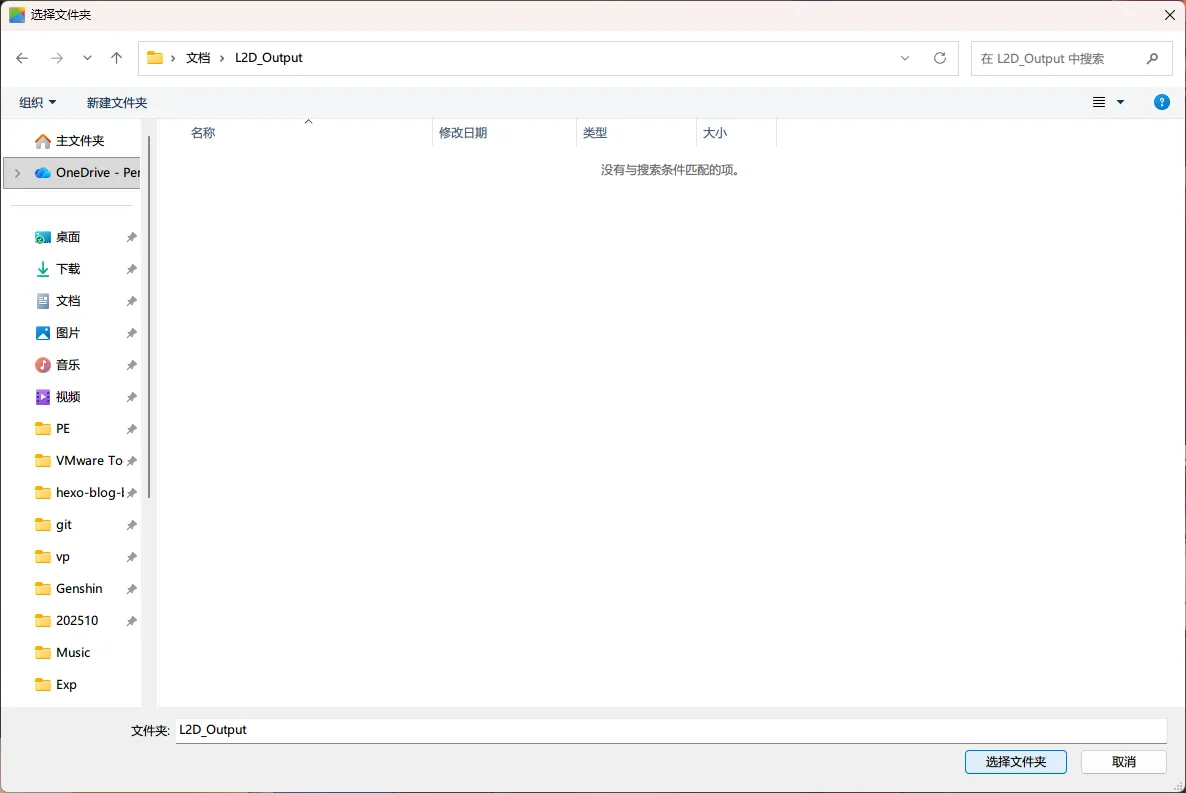
稍后会自动打开所在文件夹。
解包
建议使用 7-Zip 对在 Live2DViewerEX 导出的 *.wpk 包进行解压。
选中全部 *.wpk 包,右键单击选中的文件,在弹出的快捷菜单中选择【显示更多选项】—【7-Zip】——【解压到 “\*”】。
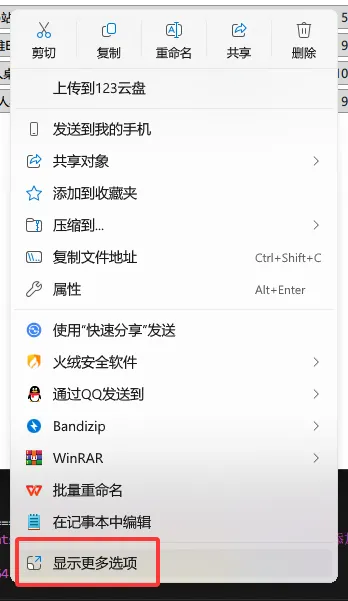

对于 Windows 10 及以下版本,或将 Windows 11 右键菜单的「更多选项」设为默认显示状态下,则在快捷菜单中选择【7-Zip】——【解压到 “\*”】。
解包从 7-Zip 提取的 LPK 模型
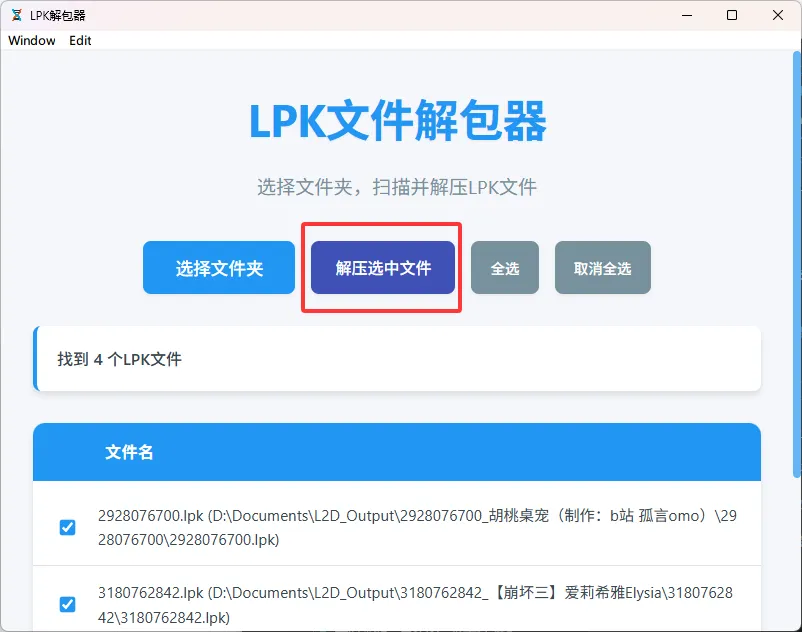
推荐使用工具:oovm/live2d-unpacker
在 Releases 页找到对应平台版本,并解压到合适的目录。
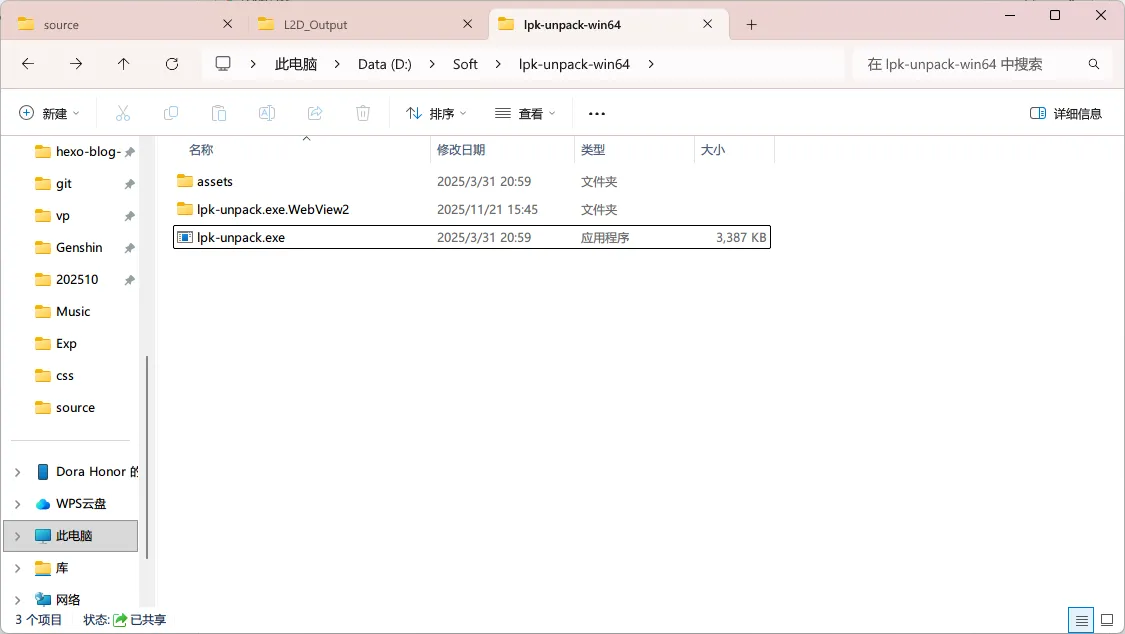
进入工具解压的目录,运行根目录下的 lpk-unpack.exe。
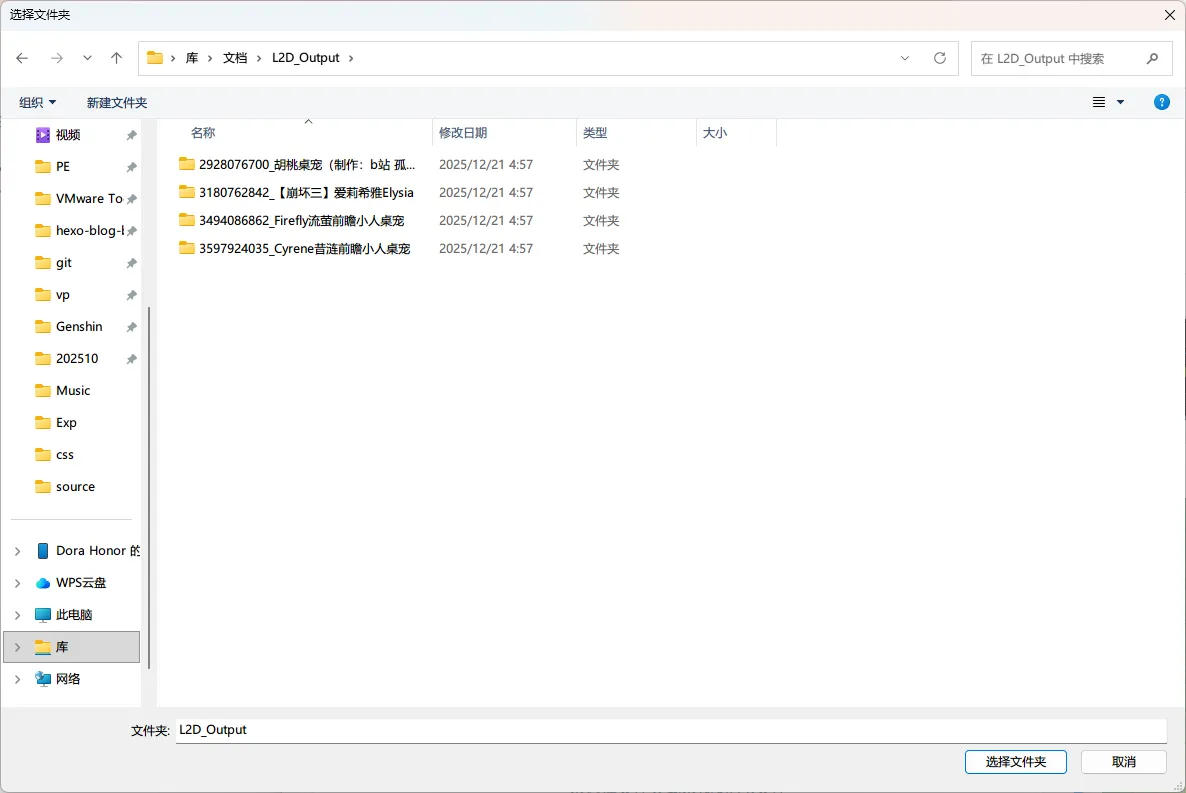
在程序界面单击【选择文件夹】,找到解压的各 LPK 模型共存的根目录,单击【选择文件夹】。
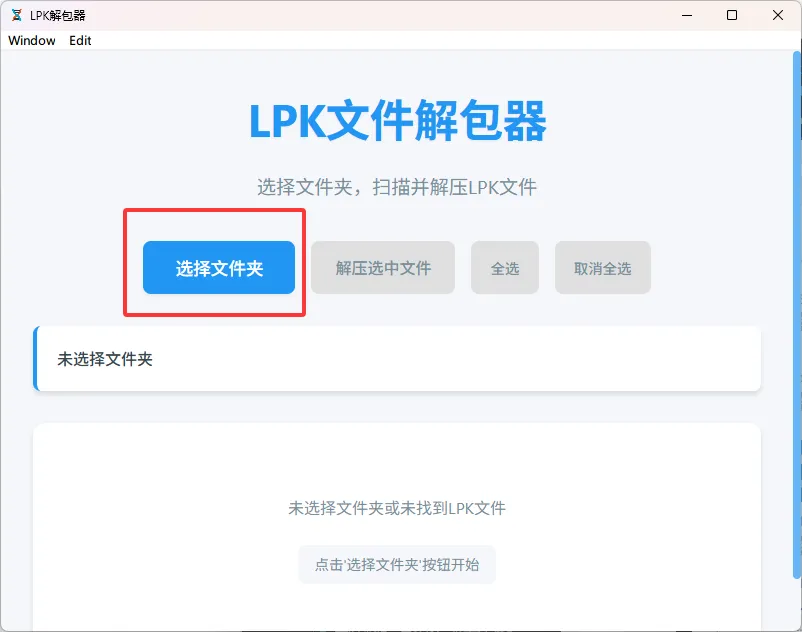
程序会自动搜索 LPK 模型,全选并选择【解压选中文件】。
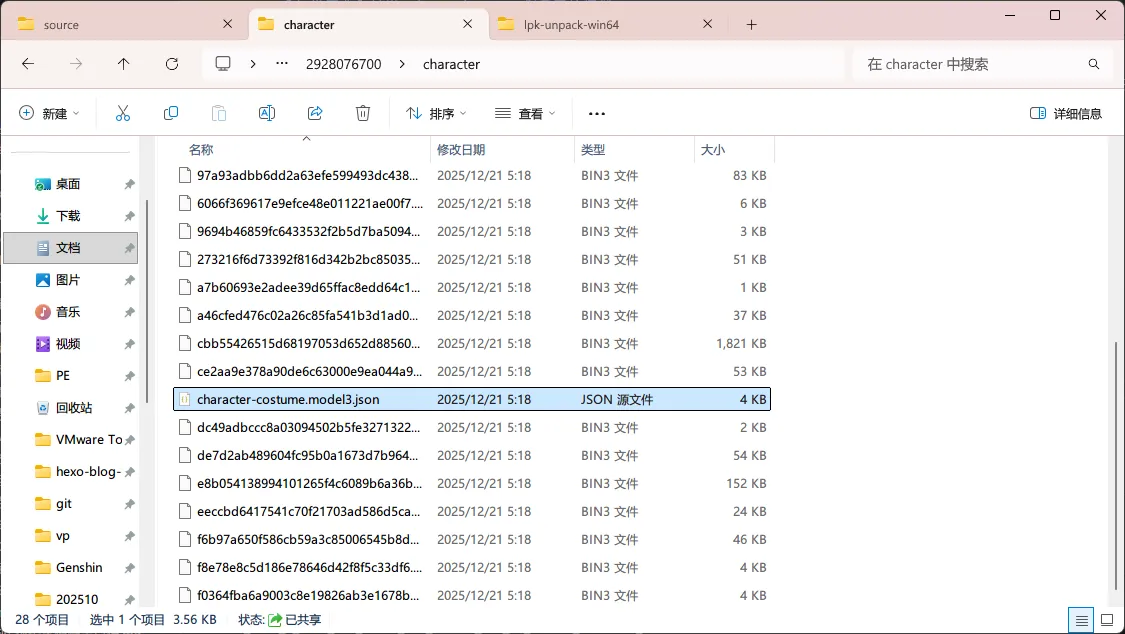
如果解压成功,在各模型编号下找到 character 文件夹,内部会有 character-costume.model3.json 文件以打开 Live2D 模型。
将解压出的 Live2D 模型放至项目文件夹
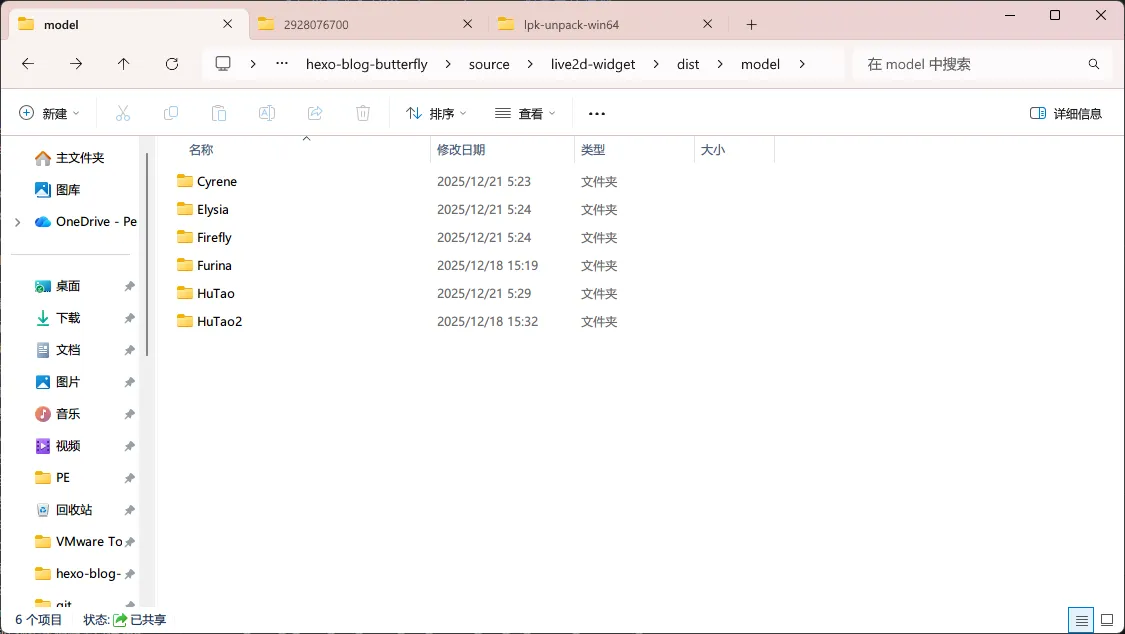
为了便于区分,强烈建议将其中解压出的 character 文件夹重命名为角色的英文名。角色英文名可查阅相应 wiki。
在 你的工作目录\source\live2d-widget\dist 中新建一个 model 文件夹,将重命名好的已被解包的模型文件夹复制进去。
在配置文件中引入 Live2D 模型
在 你的工作目录\source\live2d-widget\dist 中找到 waifu-tips.json 文件并打开。
在 models 字段按标记语法填入模型信息。
1 | "models": [{ |
字段解释:
| 字段名称 | 字段说明 | 参数值规范 |
|---|---|---|
"name" |
角色名,用英文描述 | "character",,使用英文半角逗号分隔 |
"paths" |
*.json 模型配置文件路径 |
使用中括号包围,如有多个则使用英文半角逗号分隔。对于网络路径,直接填写链接;对于本地路径,填写所在绝对路径,例如 /live2d-widget/dist/model/characters/config.model3.json |
"message" |
切换角色时的消息 | "角色的台词",根据自己喜好或对应 wiki 填入即可,如有多个则使用英文半角逗号进行分隔 |
最后四个为原本自带的网络 Live2D 模型。
加载顺序和 waifu-tips.json 中的顺序一致。
填写完成后,保存 waifu-tips.json 文件。
测试效果
开启 VS Code 的终端,执行命令开启预览。
1 | hexo clean && hexo server |
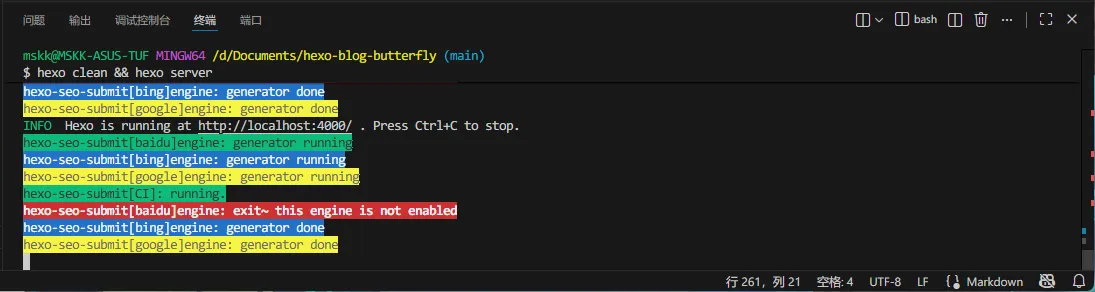
待终端出现 localhost 地址后,按住 Ctrl 并单击打开链接查看预览。
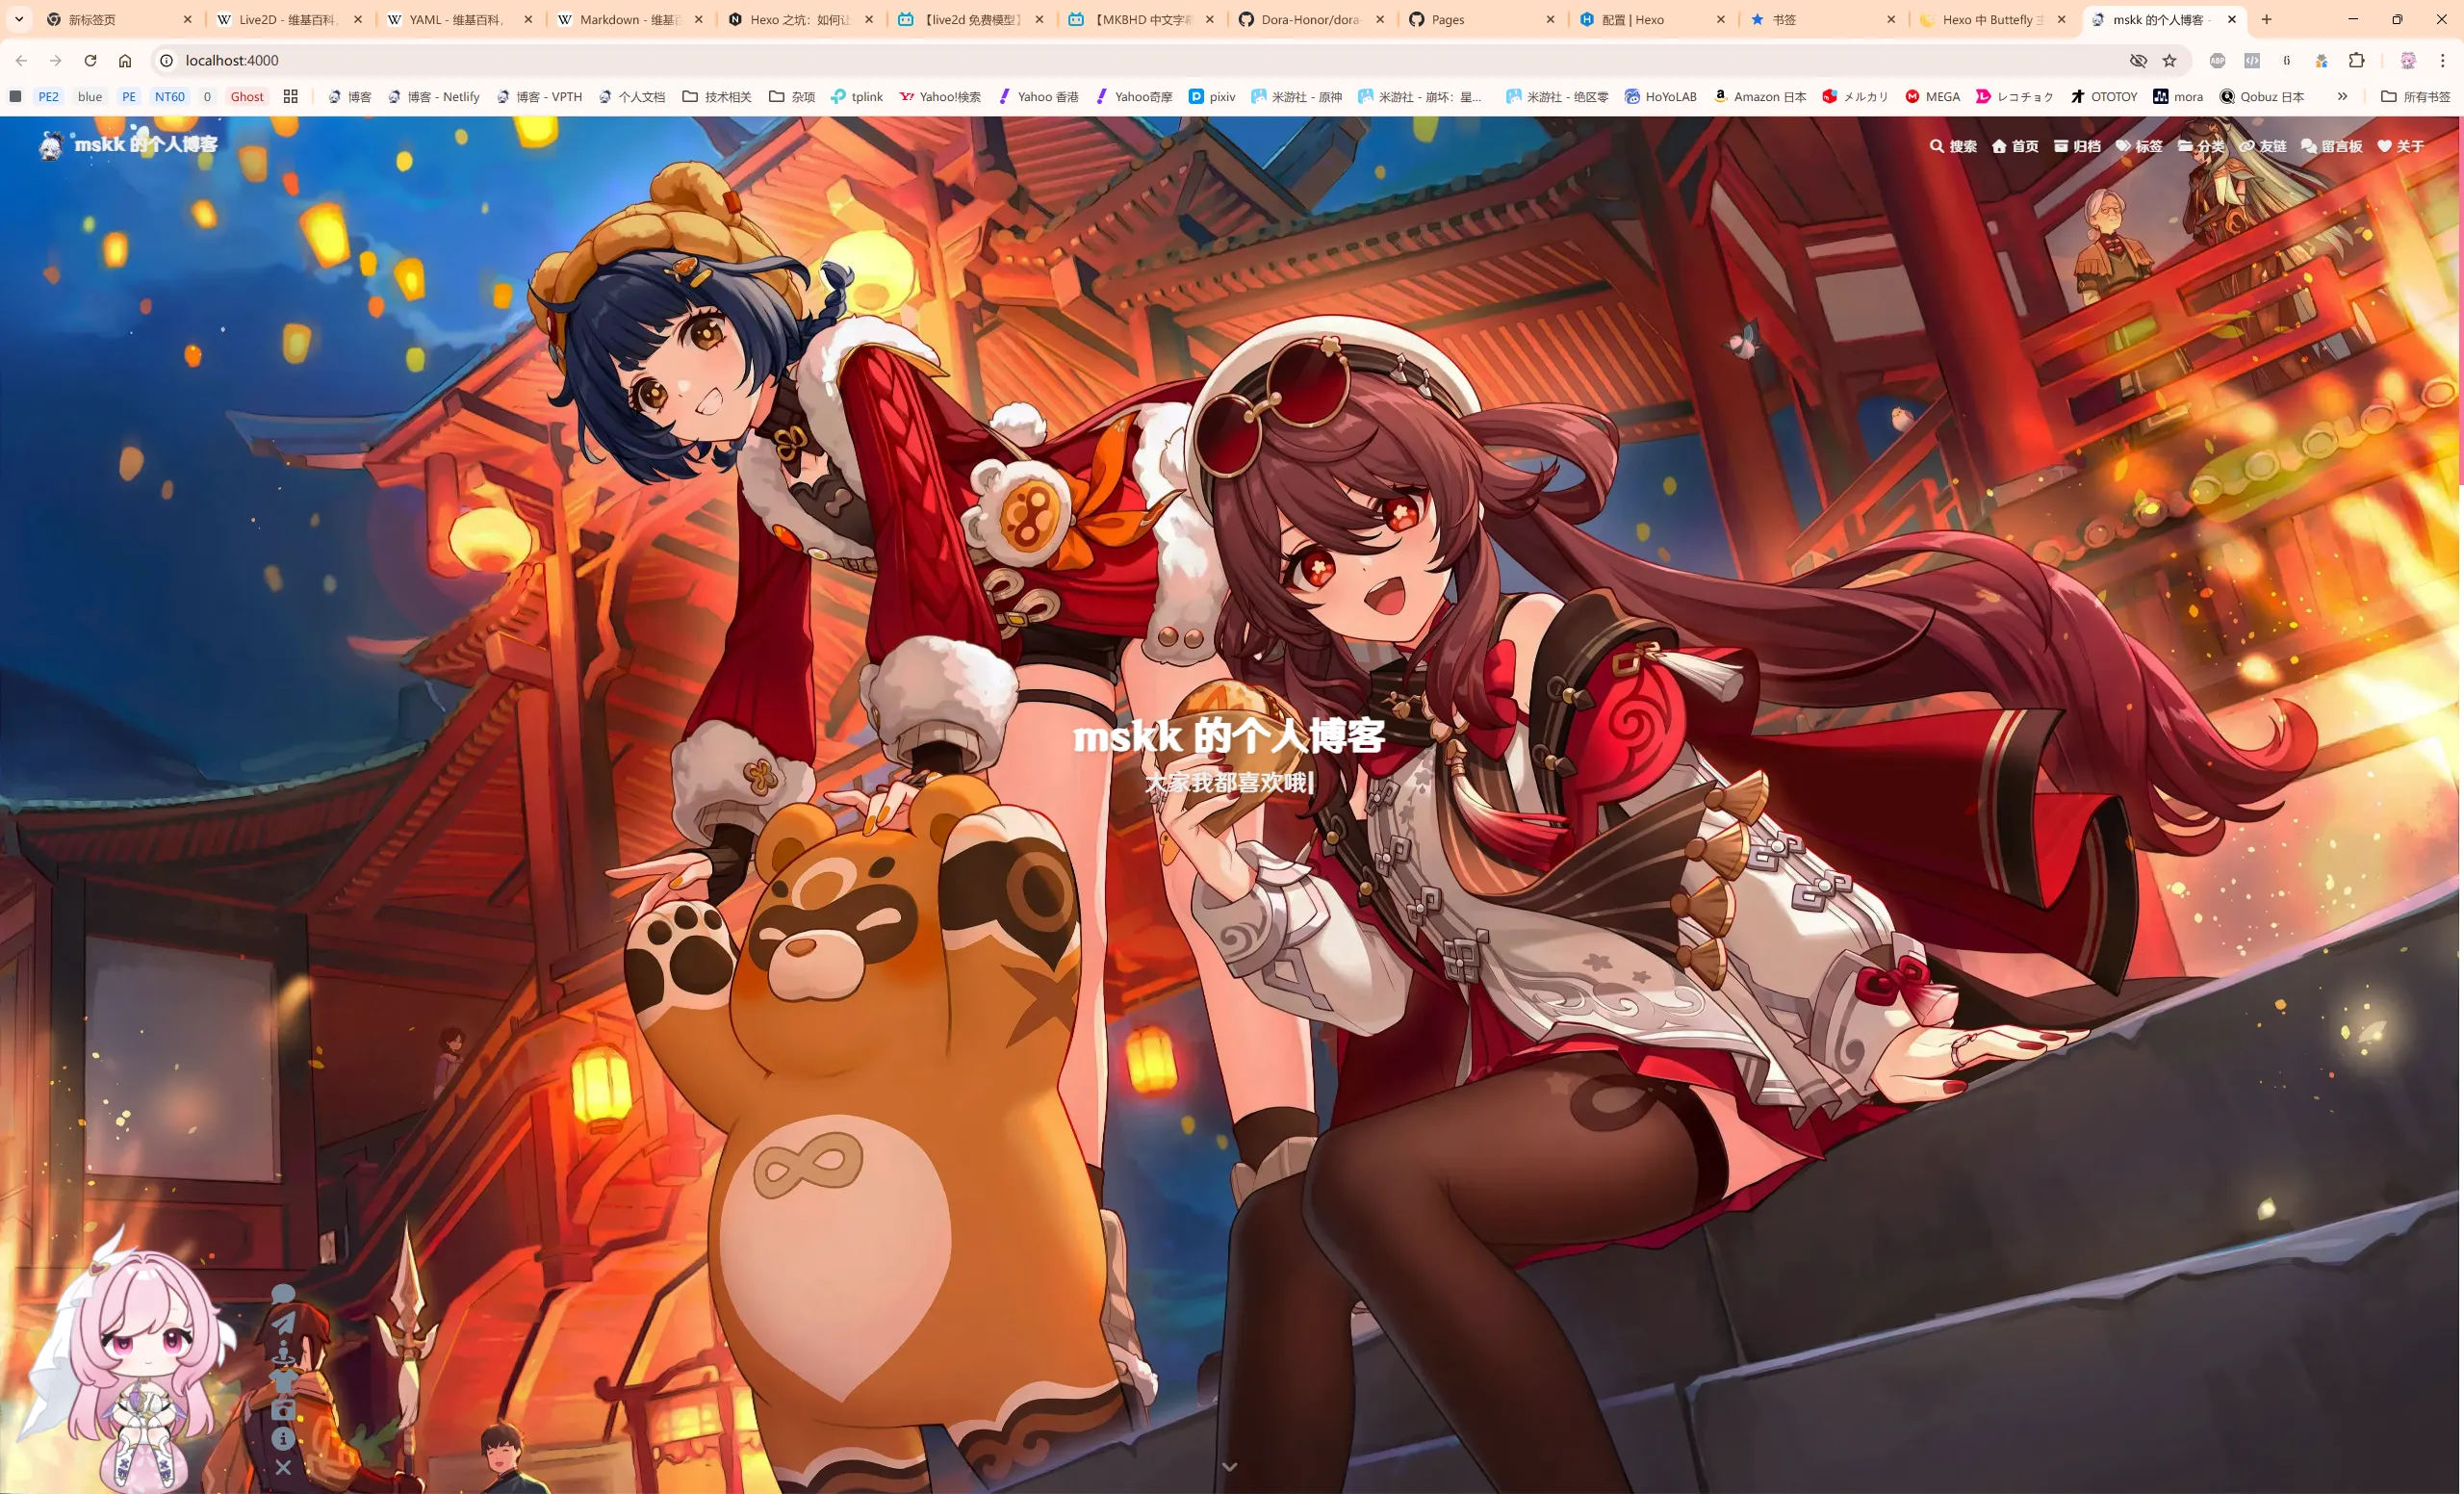
如果没有问题,关闭页面,回到 VS Code 的终端,按 Ctrl-C 停止预览服务器。
在服务器上部署(例如 GitHub Pages、Netlify、Vercel)
此步略。
题外话
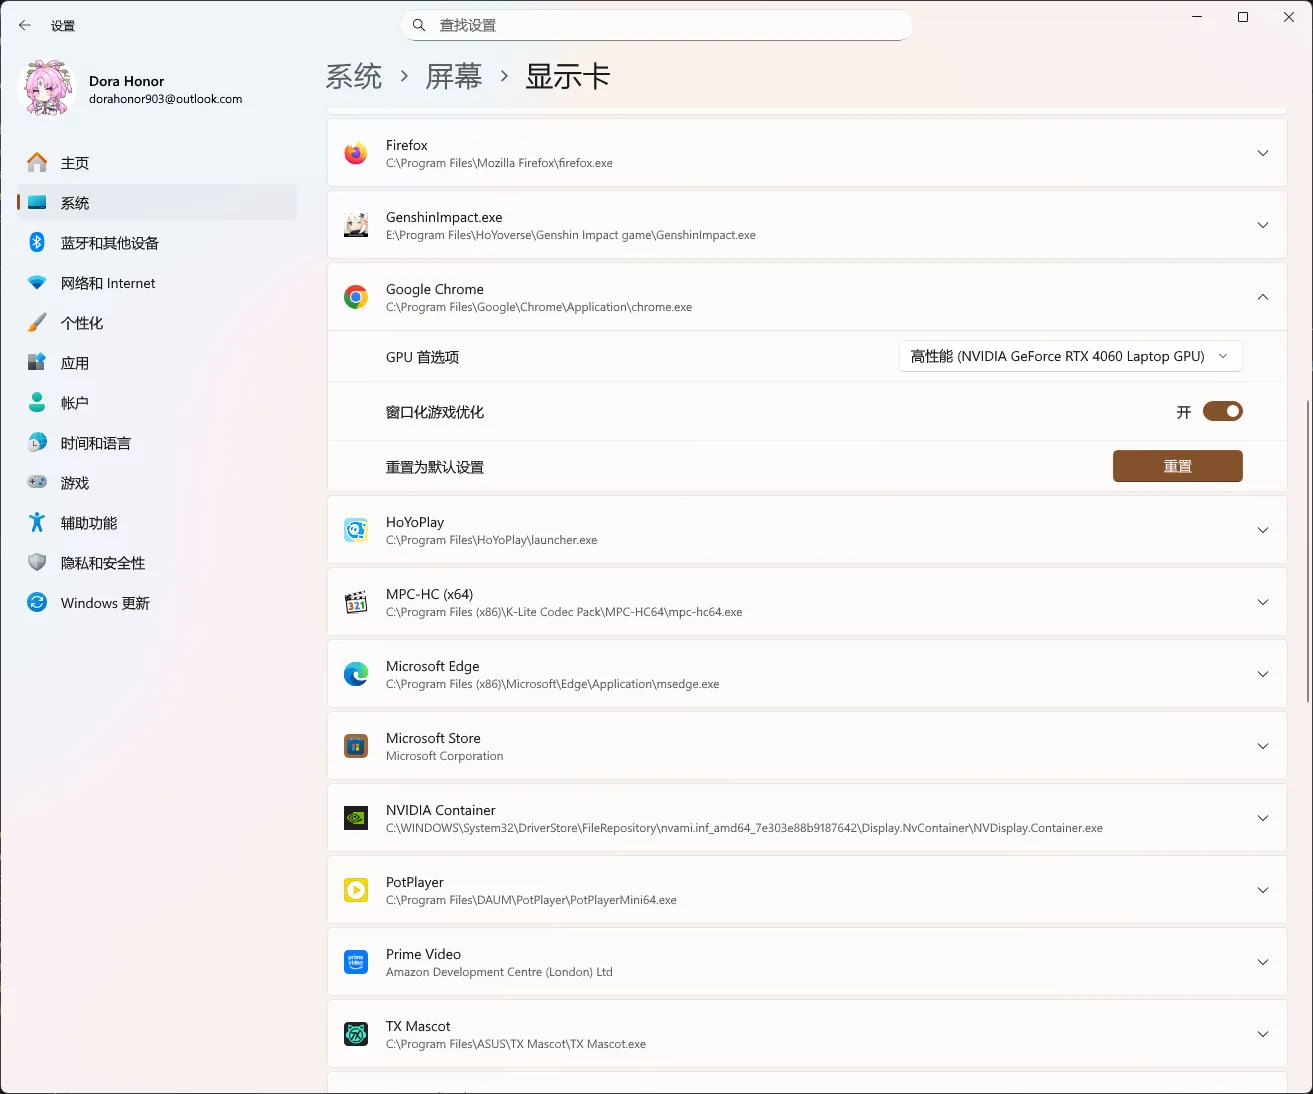
- 展示 Live2D 模型需要一定的性能,尽量使用高性能独显。如果你的笔记本电脑有独显,建议你在设置中将浏览器使用显卡设置为「高性能」,避免集显性能不足导致的卡顿。
- 最好控制模型体积,尽量不选特效太丰富的模型。
参考资料和注释
- stevenjoezhang/live2d-widget: 把萌萌哒的看板娘抱回家 (ノ≧∇≦)ノ | Live2D widget for web platform. https://github.com/stevenjoezhang/live2d-widget
- oovm/live2d-unpacker: 批量解包 Live2dViewerEx 加密的 LPK 文件. https://github.com/oovm/live2d-unpacker
- 创意工坊上传器 - Live2DViewerEX 文档. 导出物品. https://live2d.pavostudio.com/doc/zh-cn/exstudio/workshop-uploader/#_3
Live2D - 维基百科,自由的百科全书. https://zh.wikipedia.org/wiki/Live2D ↩︎